Here’s the second article in our series dedicated to Schemas. If you haven’t already done so, we recommend you read the first article in the series: How to add schema to WordPress. In this second article, we will go through the actual exercise of adding structured data (schemas) on your site using SEOPress.
Download the Ebook – Master Google Structured Data Types (schemas)
Requirements
Please be sure that you are using the most recent version of SEOPress – free or PRO version.
You will need use the PRO version of SEOPress to implement structured data on your site.
You must be sure that search engines are not blocked from indexing pages containing structured data. Check your robots.txt file and robots meta tag.
In SEOPress, ensure that the Structured Data Types feature is enabled using the iOS-like, slider here: SEO > PRO > Structured Data Types (schema.org). On the same screen, check Enable Structured Data Types metabox for your posts, pages and custom post types.
Your logo can be used in a lot of schema, so upload it now under Upload your publisher logo. Note the requirements listed under the data entry field and be certain that you upload an image that respects them.
It is also recommended that you complete information in the SEO > Social Networks > Knowledge Graph section.
And don’t forget to Save changes as you go.
What’s the difference between Automatic and Manual schemas?
There are two types of schema in SEOPress:
- Manual: this type of schema is applied to pages, posts or other publication types using the Structured Data Types metabox. The structured data is applied individually to the page you are editing.
- Automatic: these Schema are created from the SEO > Schemas screen using the Add Schema button. They are applied globally by publication type (to all posts for example). Once they are defined, you will also see them in the Structured Data Types metaboxes of individual publications. See exercise #3 below.
Exercise #1: Add LocalBusiness Schema for a business address
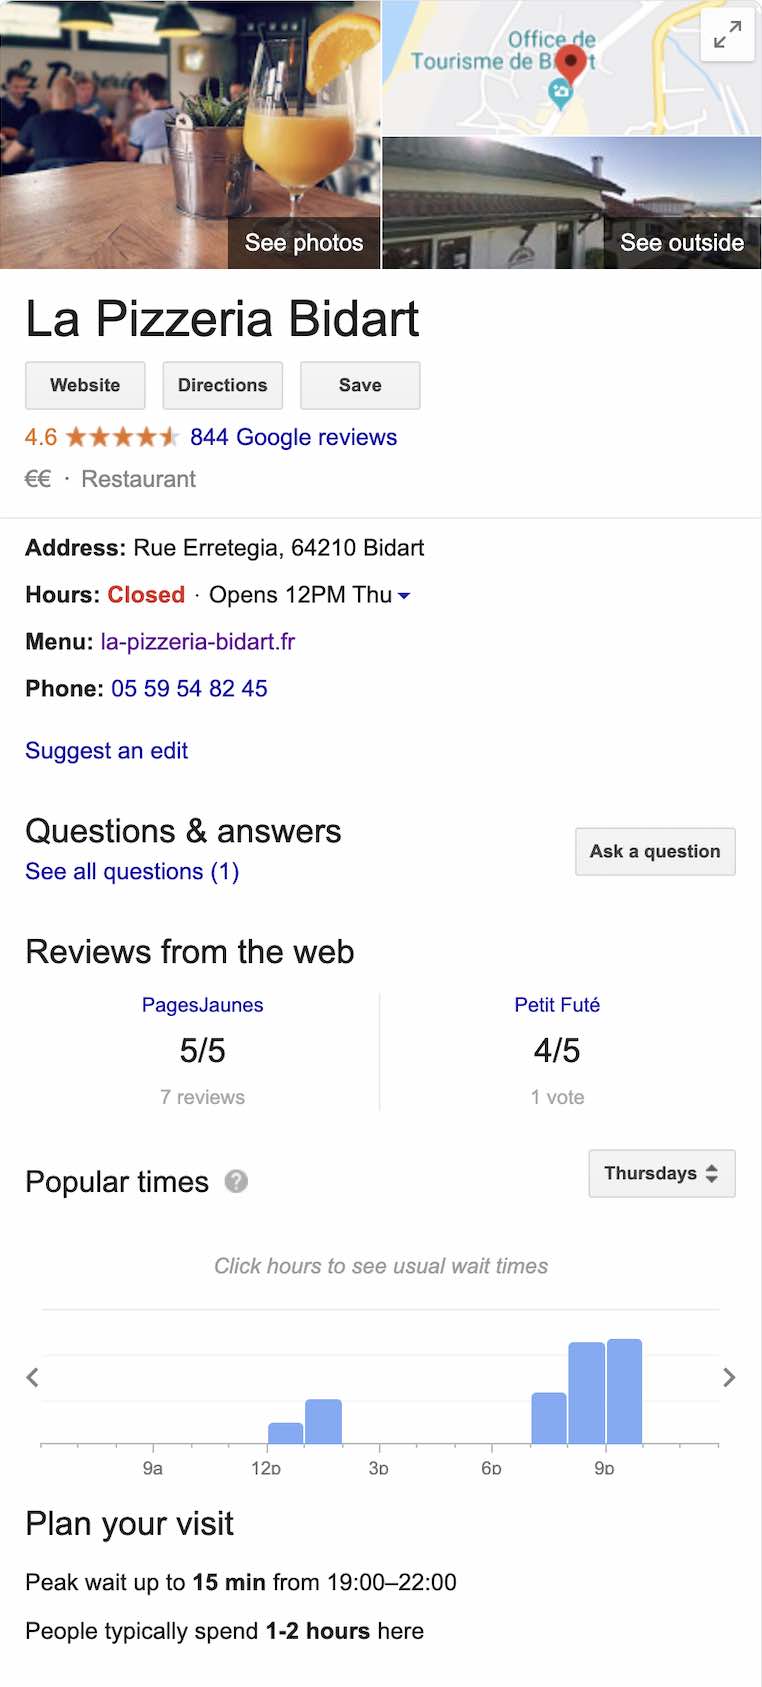
Let’s start with a classic case. You own a restaurant and you have created a website to promote the restaurant online. The site details your menu and different dishes you serve.
You can add the LocalBusiness schema to your site in order to obtain a Knowledge Graph card in Google (see screen shot). This is shown when people search for your restaurant by name. This feature highlights essential information about your business such as opening hours, address, telephone number, photos, client reviews, etc.
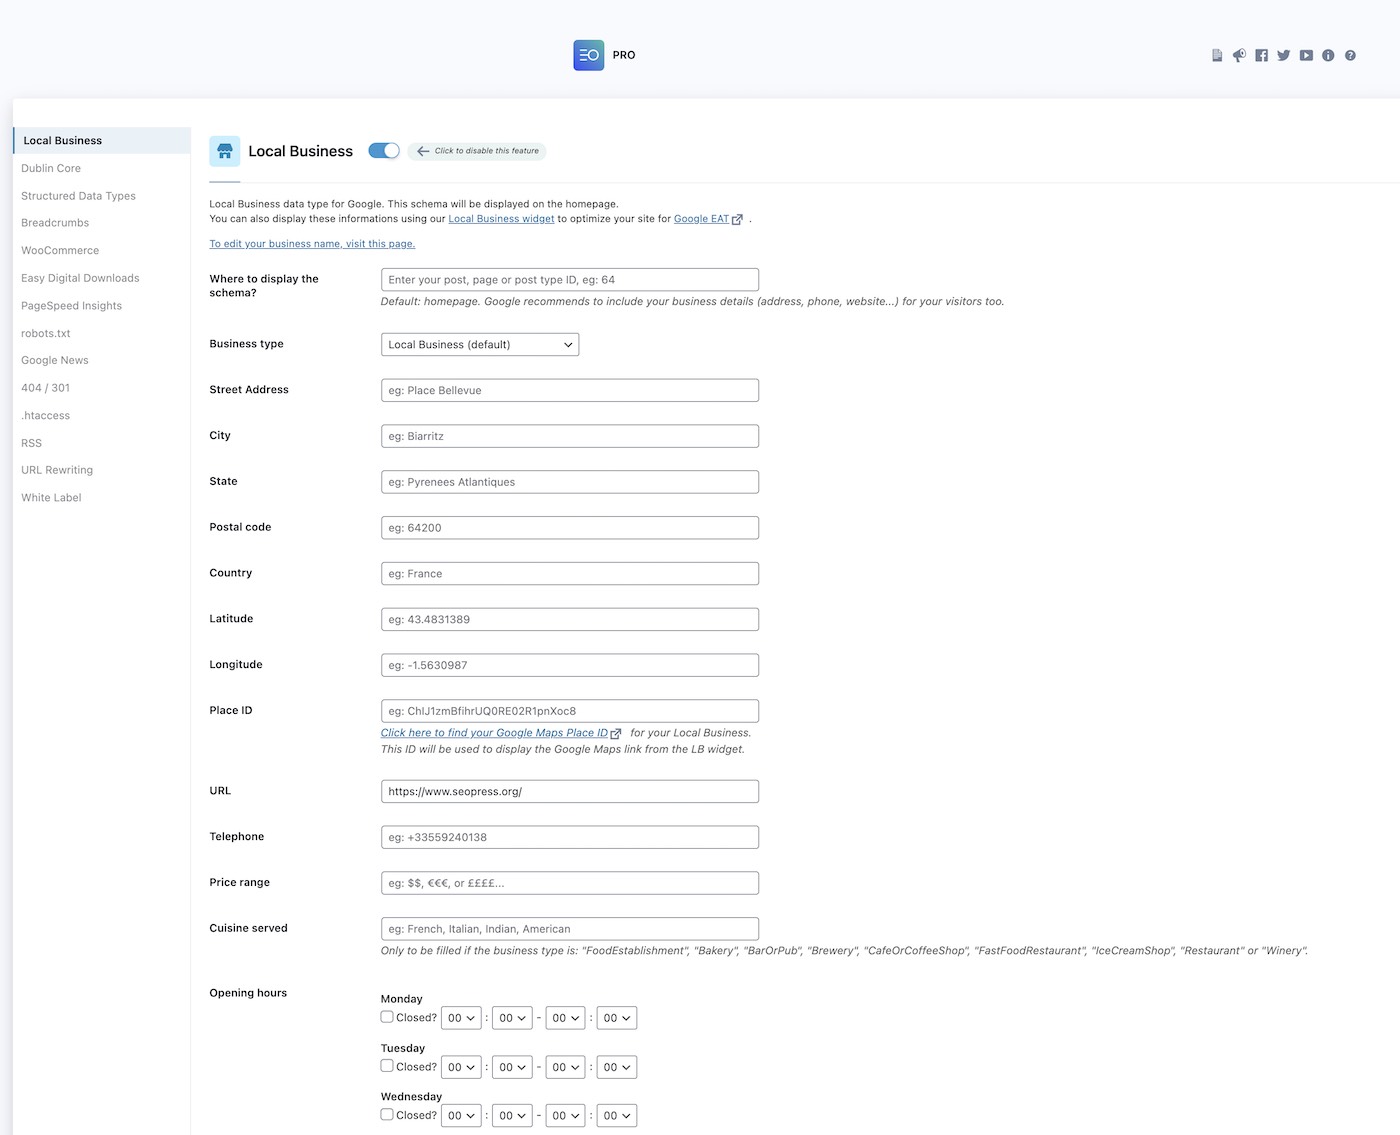
If your company has just one business address, you can add your Schema using SEO > Pro > Local Business.
For our exercise, select “Restaurant” as Business type. For your own company, search for a suitable company type in the dropdown list. If you can’t find one, leave Local Business (default).
Fill in the rest of the fields as best you can, taking care to follow the formats shown in the examples. For example, “eg: +33559240138” indicates that you should enter your phone number in this international format, with a”+”, the country code and no spaces.
All of the fields are required by Google.
Save Changes and clear your cache if you have one.
About Opening hours
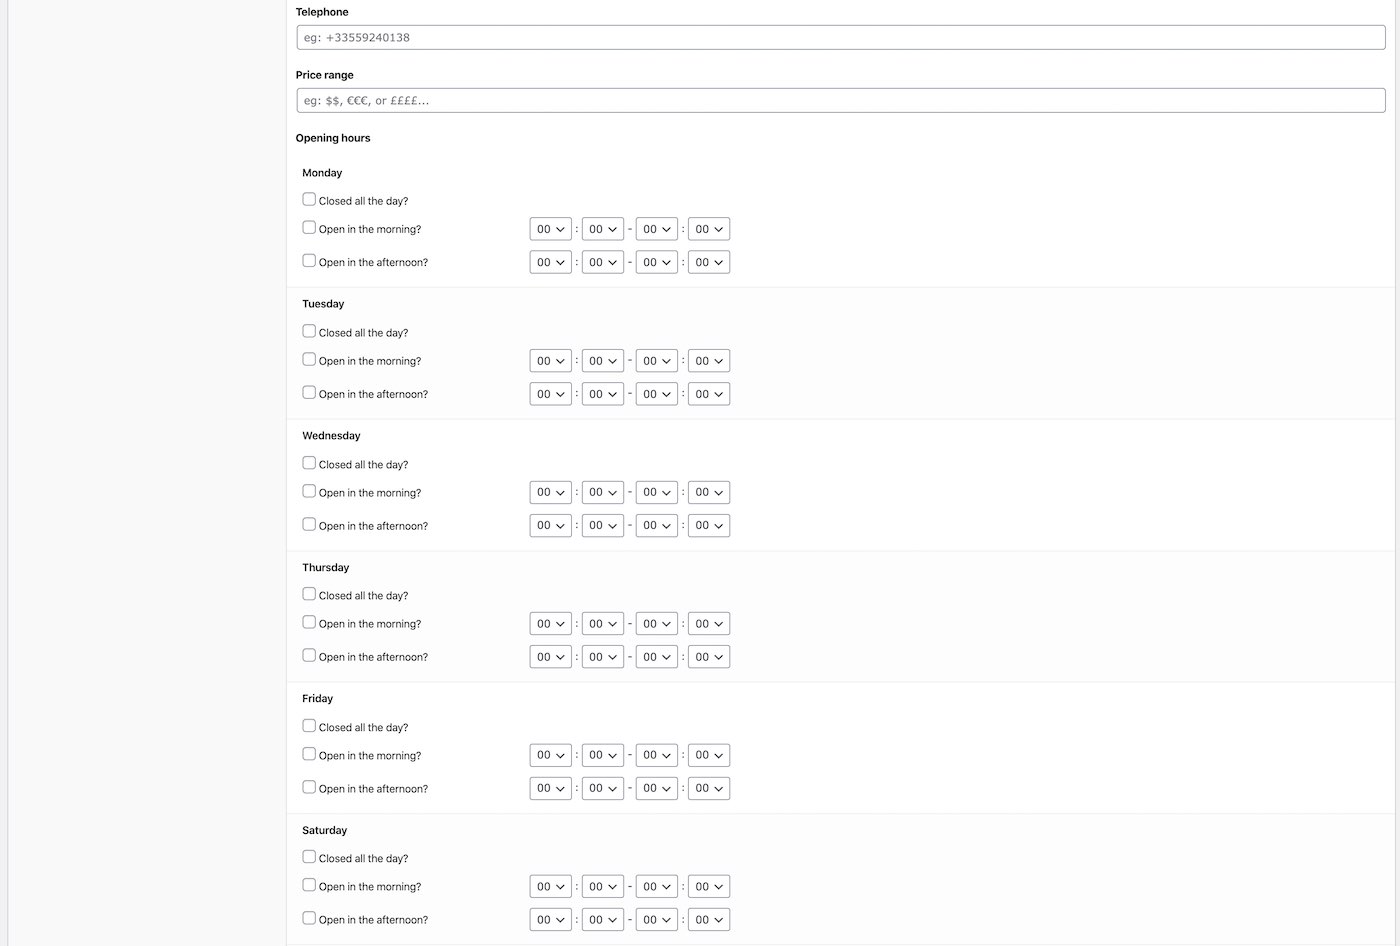
If your business is open all day, 7 days a week, set hours as 0:00 and 23:59 for each day of the week.
If your company closes for lunch, then you need to disable the Local business feature using the green, iOS-like slider at the top of the page and use a manual schema. The manual schema will give you more flexibility on what opening hours you display.
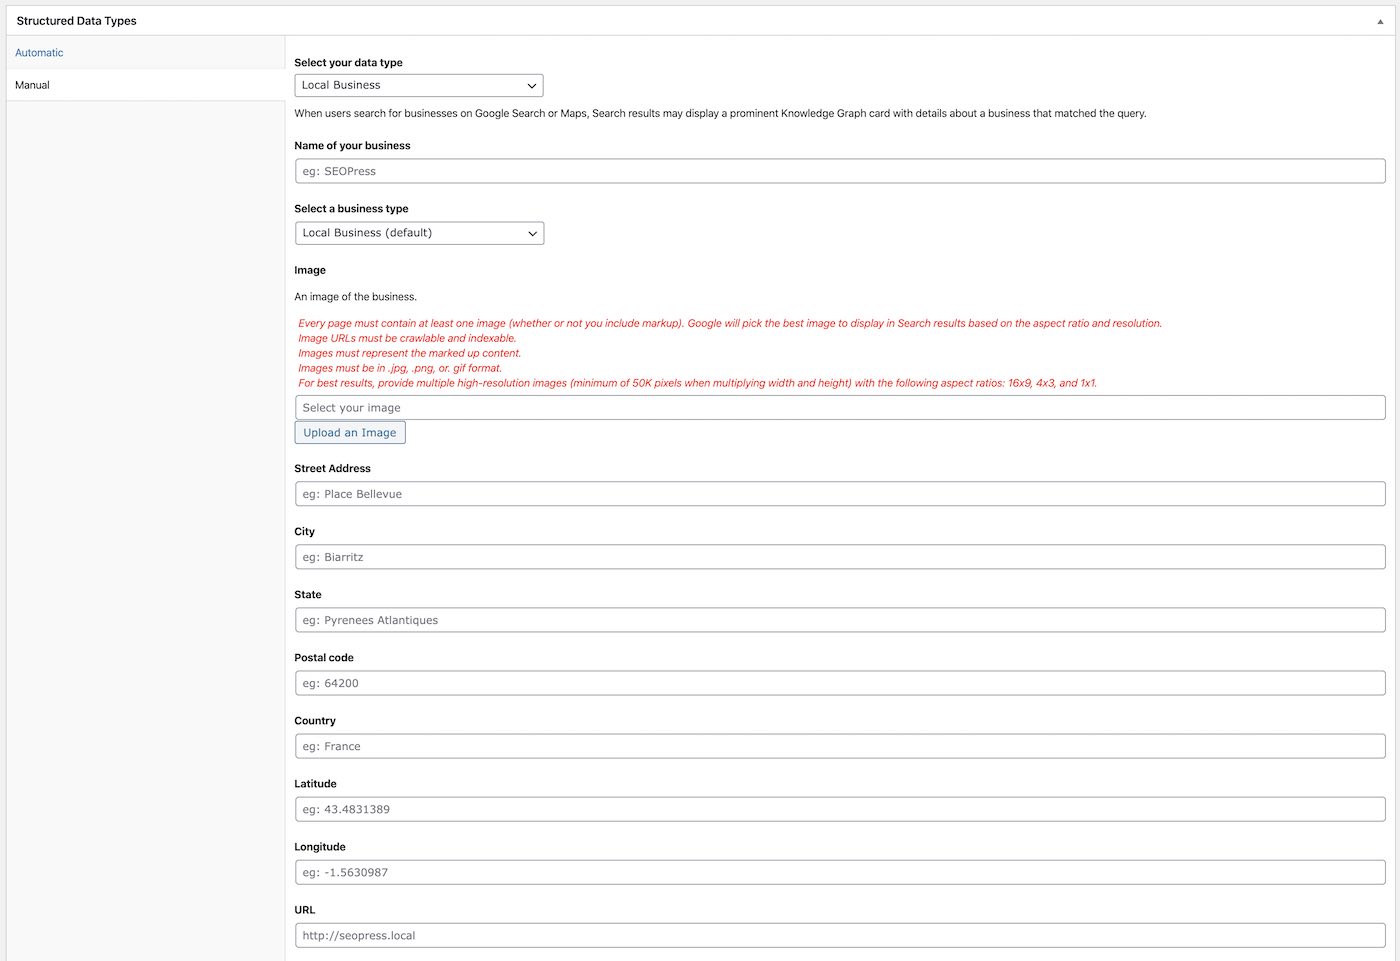
To enter a manual LocalBusiness Schema for your website, edit your homepage in WordPress and go to the Structured data types metabox, select LocalBusiness and continue from there. The Opening hours section allows you to enter opening and closing hours for both the morning and the afternoon.
What if you have more than one business address?
31/12/2020 Update: since version 4.2 of SEOPress PRO, you can now add unlimited manual schemas to your post including multiple Local Business schema.
One solution is to create a page for each address and add a different LocalBusiness schema to each page using the Structured data types metabox. You also need to disable the global Local Business feature here SEO > Pro > Local Business using the green, iOS-like slider.
Exercise #2: Adding FAQ schema to your Frequently Asked Questions page
Giving answers to Frequently Asked Questions (FAQ) to your site is an excellent way to attract visitors and improve conversions. Adding FAQ schema to your pages can help you obtain extra visibility for your pages in the search engine results. FAQ schema are quick and easy to set up in SEOPress and Google is currently keen to add this type of data to improve your search results. So, it would be a shame to miss out!
To add FAQ schema to a page, go to the Structured data types metabox and click on the Manual tab. Select the “FAQ” option and add the questions and answers that feature on the page, clicking on Add question for each new question.
Update your article and clear your cache.
Exercise #3: Adding a Product schema automatically for WooCommerce
Now that we’ve had a look at some manual schemas, let’s have a look at some automatic ones. If you have a big ecommerce site, adding Product schema manually, product by product, will take you a long time! That’s why we added automatic schema to SEOPress!
If you have WooCommerce installed you will be able to add Product schema automatically to each product page by following this guide:
From SEO > Schemas, click on Add schema.
Name your Schema, for example “Products” and select “Product” as your data type. Under Show this schema if is, chose “Product” (again!)
Then for each field you can select a predefined variable, “Manual text” or “Manual text on each post“. For example, for Product name, associate “Post Title / Product title.”
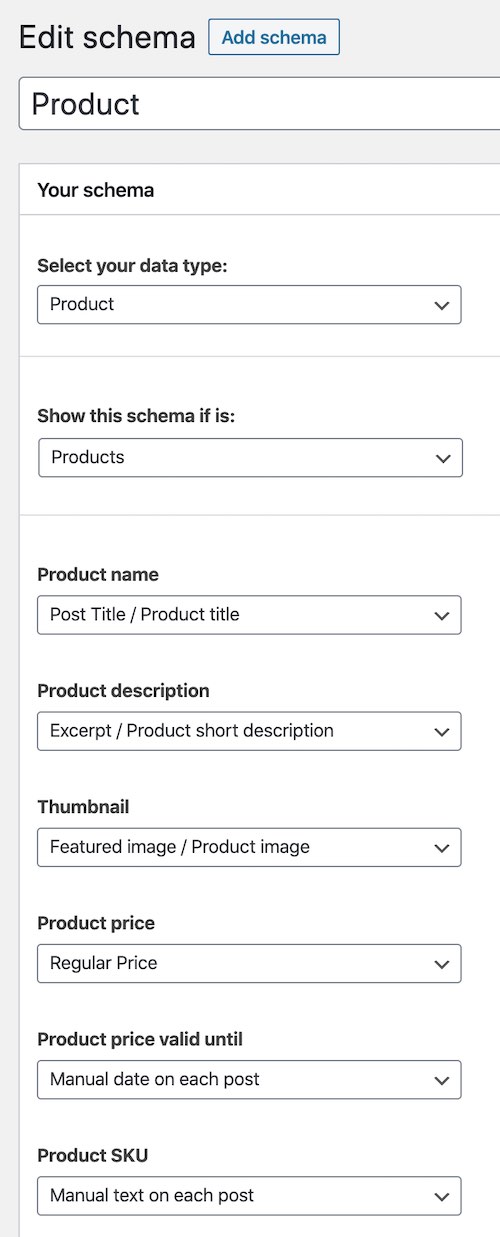
If you chose “manual text on each post” for a field, you’ll be able to enter its value when you edit the product in WordPress. You’ll find it in the Automatic tab of the Structured Data Types metabox (see the screenshot below).
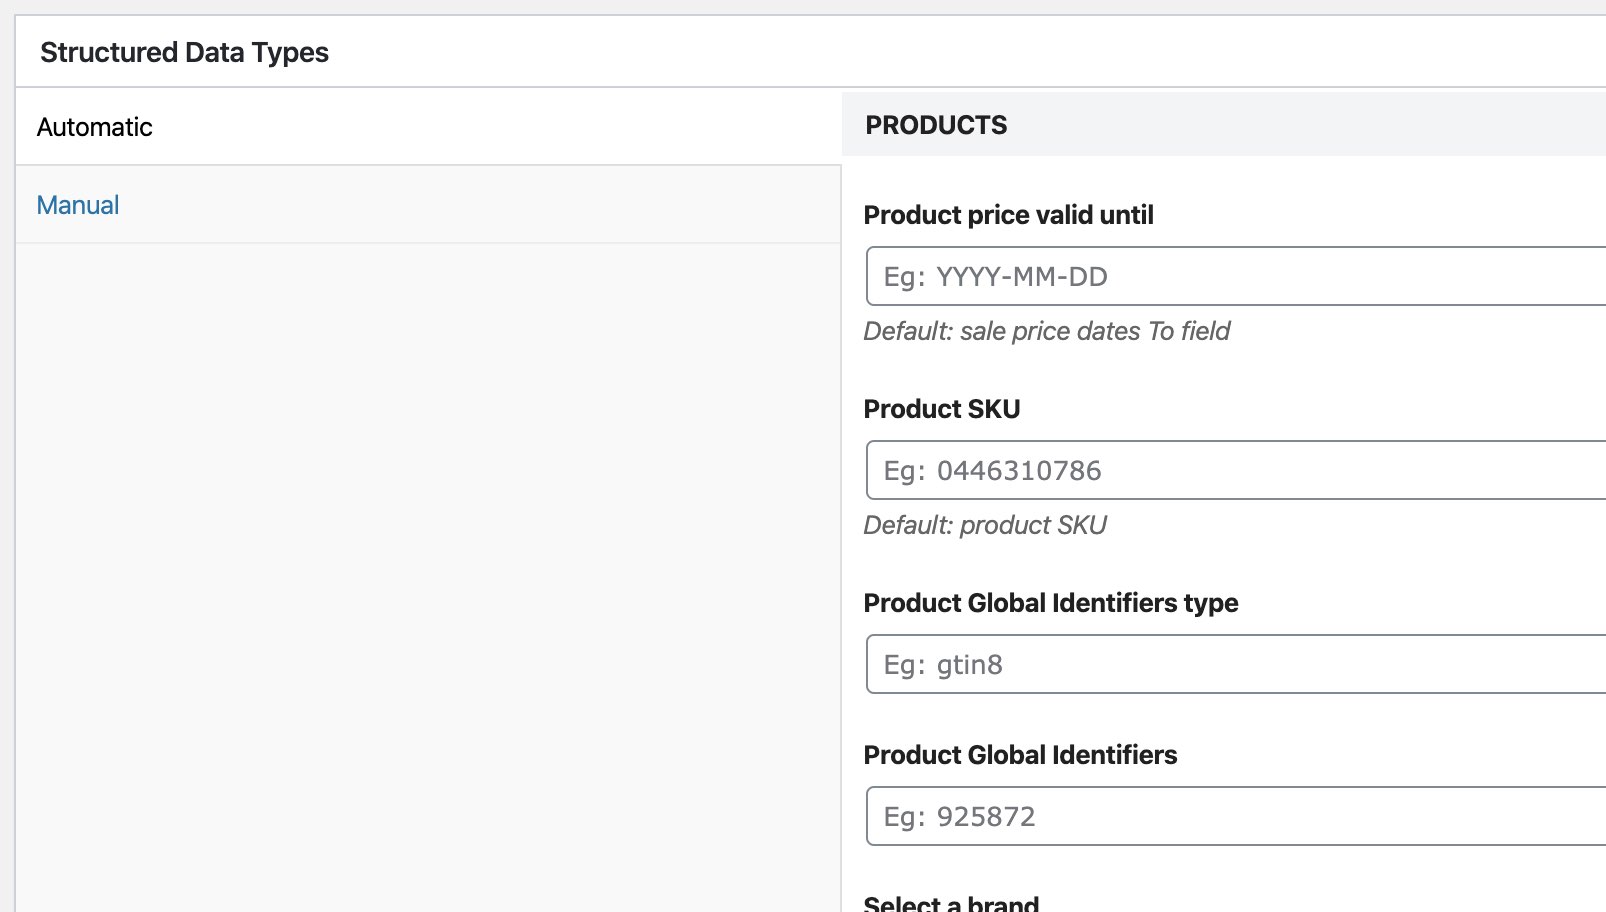
SEOPress will add Product schema dynamically to every product page using JSON-LD markup without any technical intervention from you!
Remember to clear your cache after adding schema.
I’ve already got Product schema on my product pages! Where did that come from?
Since version 3, WooCommerce adds Product schema to all your product pages, also using the JSON-LD format. Unfortunately, these schemas are incomplete and will generate error messages in Google Search Console. We strongly recommend that you disable WooCommerce schemas and implement the Product schema using SEOPress.
To do this go to SEO > PRO > WooCommerce and check the box Remove default JSON-LD structured data (WooCommerce 3+). Save changes and clear your cache.
Test your schemas
A lot of themes and plugins add schema automatically to your pages. It can be a major problem, because schema may be duplicated, out of date, have empty values, etc.
The good news is that Google has created a great tool to test schema markup of pages.
Enter a URL, click Run Test and wait a few seconds for results to show. The results of test are shown in the right-hand column with a list of Schemas detected on the page. Click on a Schema name to show the details of the test results, including any errors or warnings.
Test your Schemas with Google’s Structure Data Testing Tool

Validate your Schemas with Google Search Console
Google Search Console will tell you if Google has found and validated your structured data. Google has specific reports for Schema such as Product, FAQ, Breadcrumbs and Logo. If there are errors in your Schemas, you can see detailed reports to understand the fixes you need to apply. Once pages are fixed, you can ask for Google to validate all the pages again. Click on “Validate Fix“.
Be aware that the validation can take days, or weeks. The state of your validation is displayed in Search Console and you’ll receive notifications by mail informing you of progress.
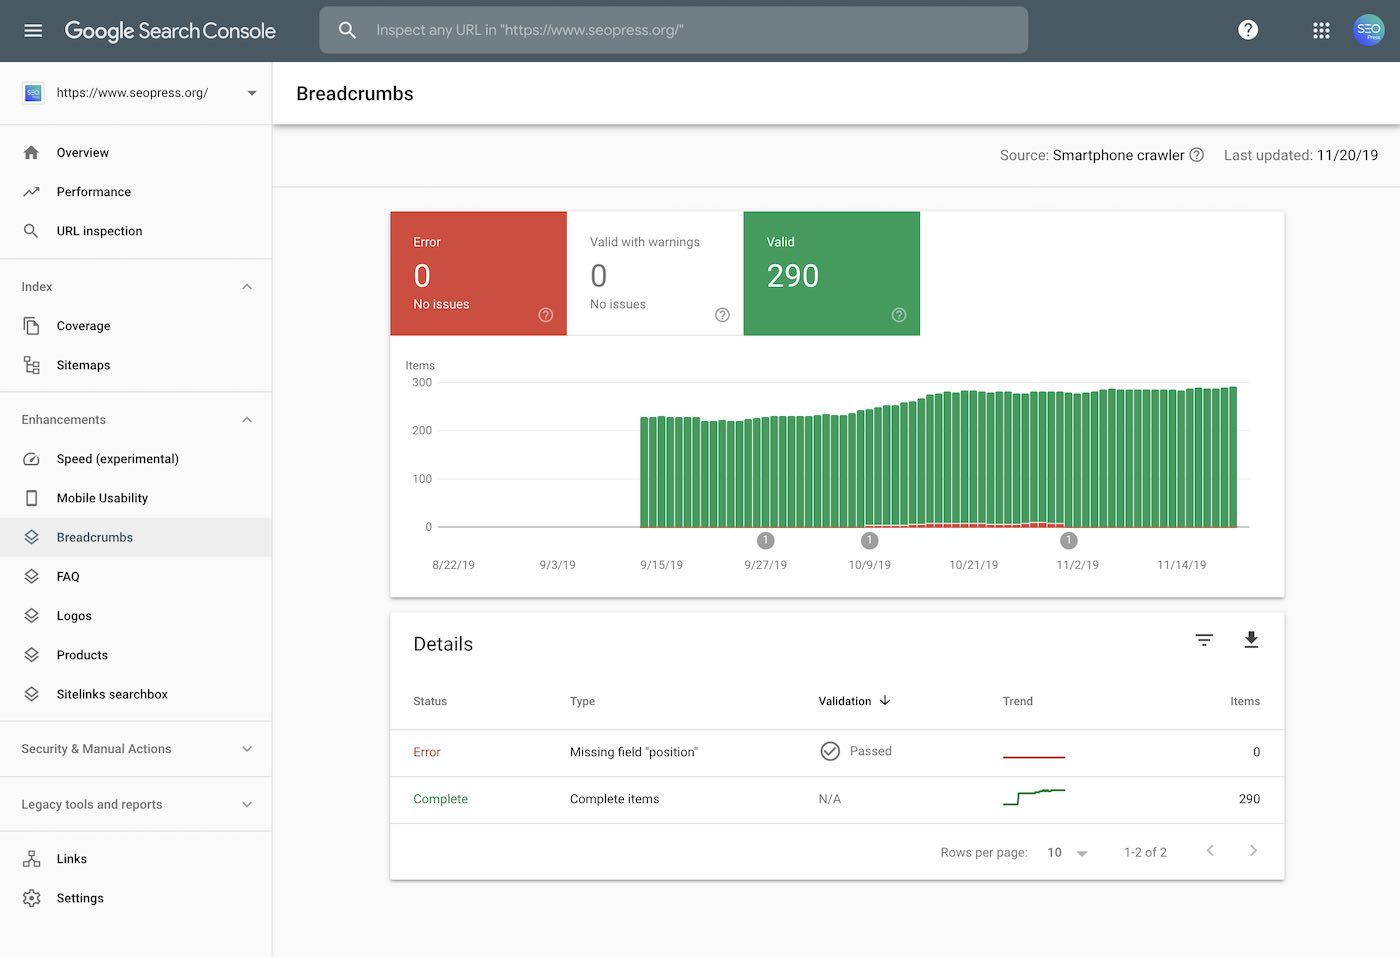
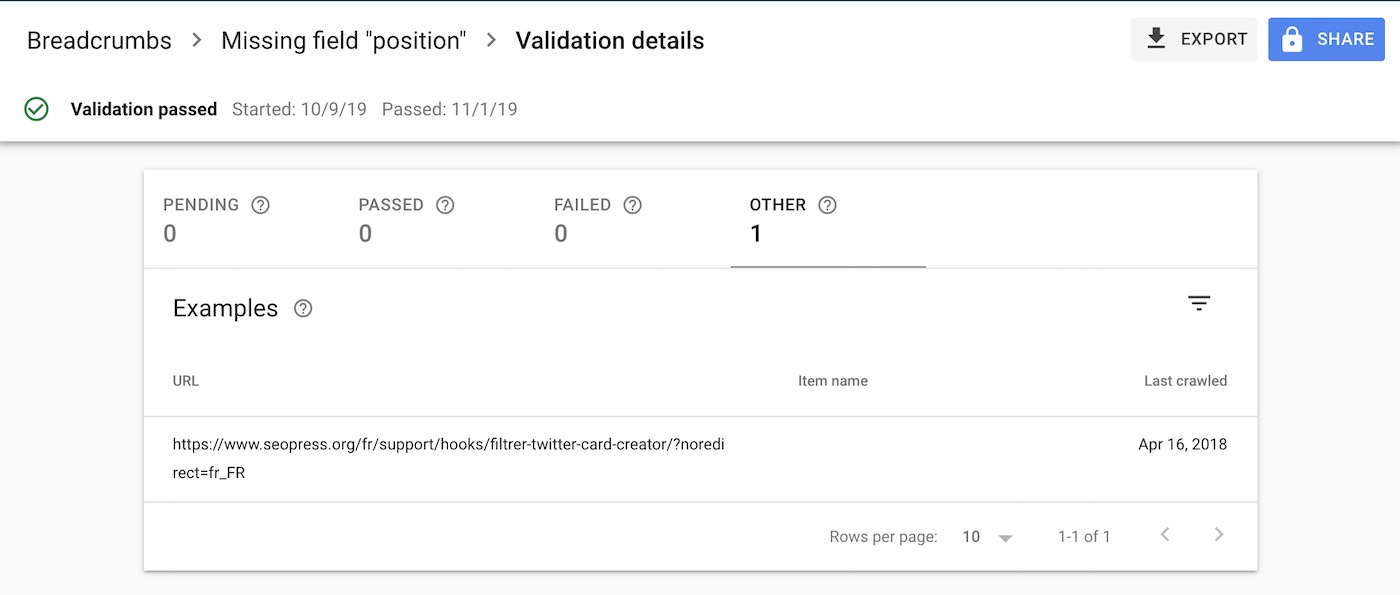
In this screenshot, we see that Google has detected 290 Breadcrumb Schemas on the site. Google had indicated a Missing field ‘position’ error on one page, but we checked and the code was correct. We therefore sent a Validate Fix request to Google and, as the image shows, the Validation was “Passed“. Here’s the detail:
Conclusion
Test your Schema as often as you can. Check into Search Console regularly, to make sure that there are no errors or warnings. But when you request a fix to be validated, be patient for changes to appear. Don’t over do Schema on your pages either. Only add what is necessary.
To learn more, we recommend you read our different Guides on this subject: